
Dirty vinyl siding can make an otherwise solid house look tired fast, especially after a Clarksville spring when pollen sticks to everything and humidity helps green streaks settle in. Vinyl siding pressure washing can fix that, but only if you treat it like a careful rinse-and-clean job, not a blast-everything project. Here’s how to get the siding clean without forcing water behind the panels or leaving damage behind.
What vinyl siding pressure washing really means
The phrase sounds more aggressive than the job should be. With vinyl, the goal is not maximum force. The goal is controlled cleaning: enough water pressure to rinse away loosened grime, plus the right detergent and technique to do the heavy lifting.
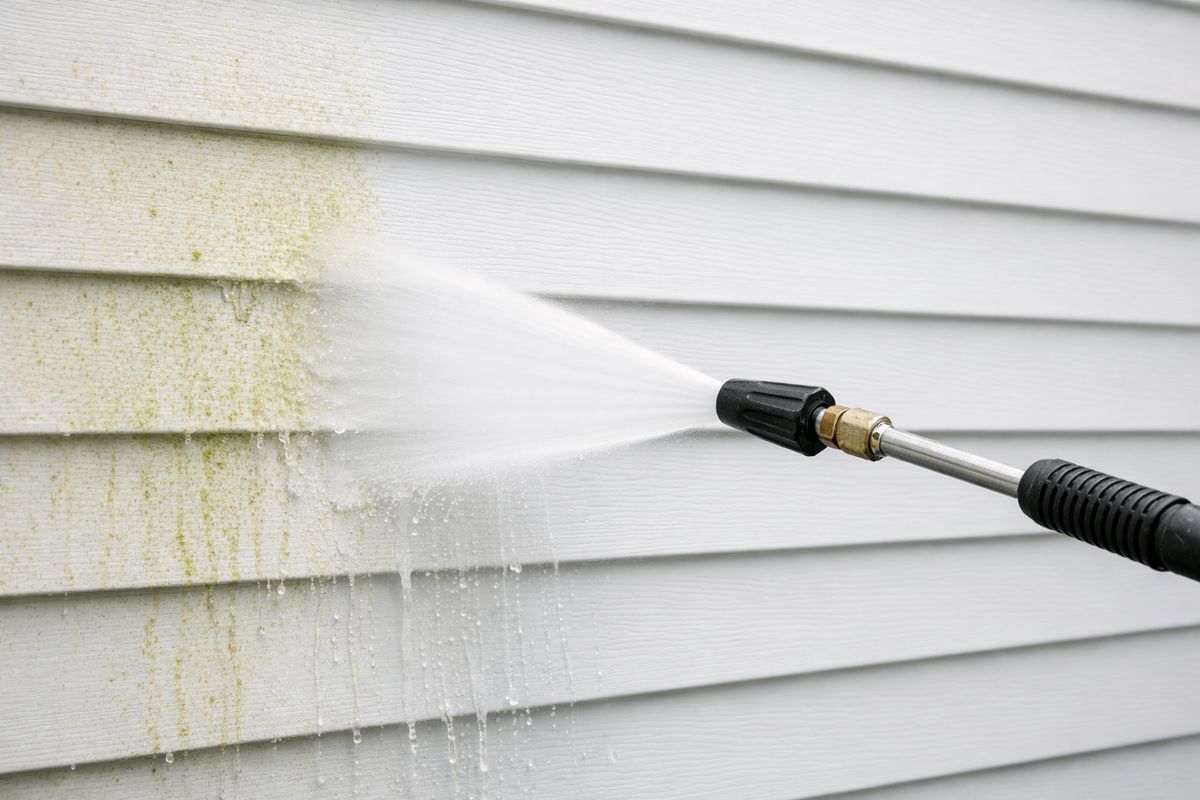
That matters because vinyl siding is tough, but it is not invincible. If you spray upward under the laps, you can push water behind the panels. If you get too close with too much pressure, you can scar the surface, loosen a panel, or make oxidation look worse. In humid places, buildup often includes pollen, mildew, and algae, which means chemistry usually matters more than raw PSI.
That shift toward gentler cleaning is not just a homeowner preference. Across the industry, soft washing has become a major part of house washing because it cleans siding well without the risks that come with high pressure.
Before you start: what you’ll need
Get everything together before you pull the hose across the yard. Halfway through is the worst time to realize you still need outlet covers or a different nozzle.
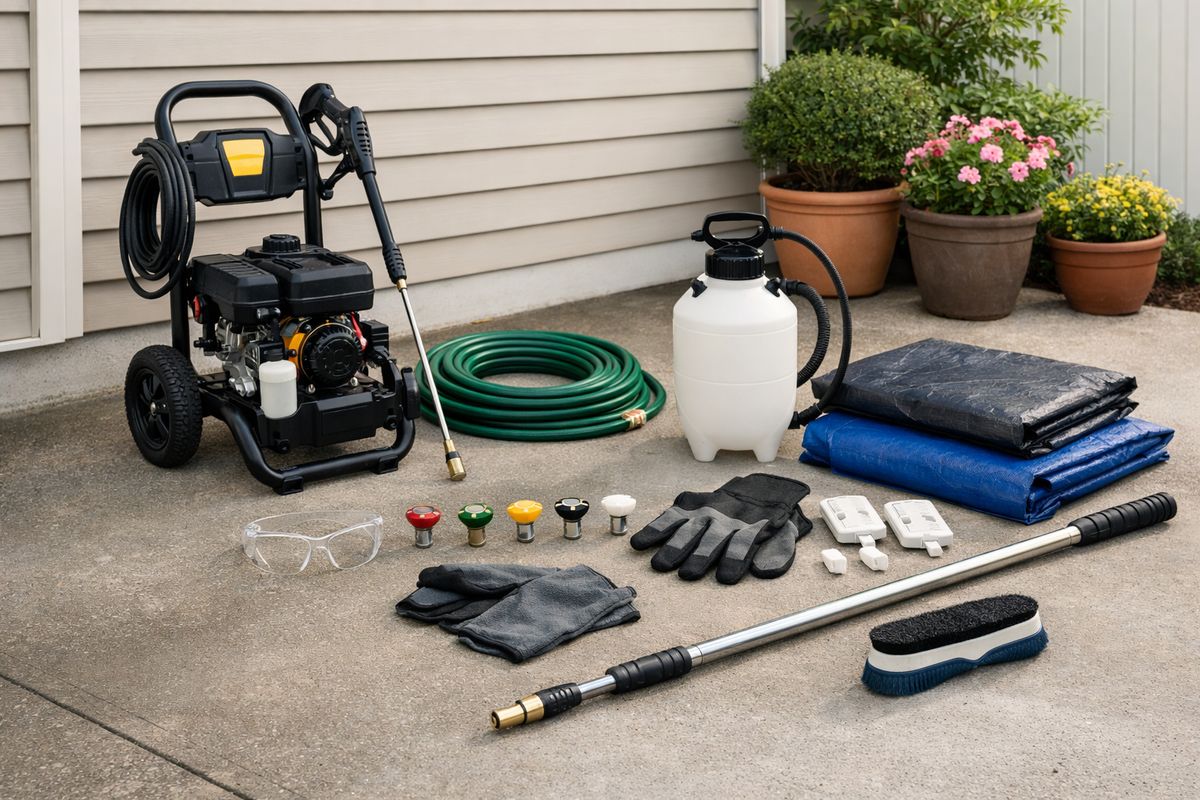
You’ll want a pressure washer that can be dialed down, a garden hose, a siding-safe detergent, a wide fan-tip nozzle, eye protection, gloves, and something to protect plants and electrical components. A pump sprayer can help if your machine’s detergent pickup is fussy. Closed-toe shoes matter too, because wet concrete and soapy overspray get slick in a hurry.
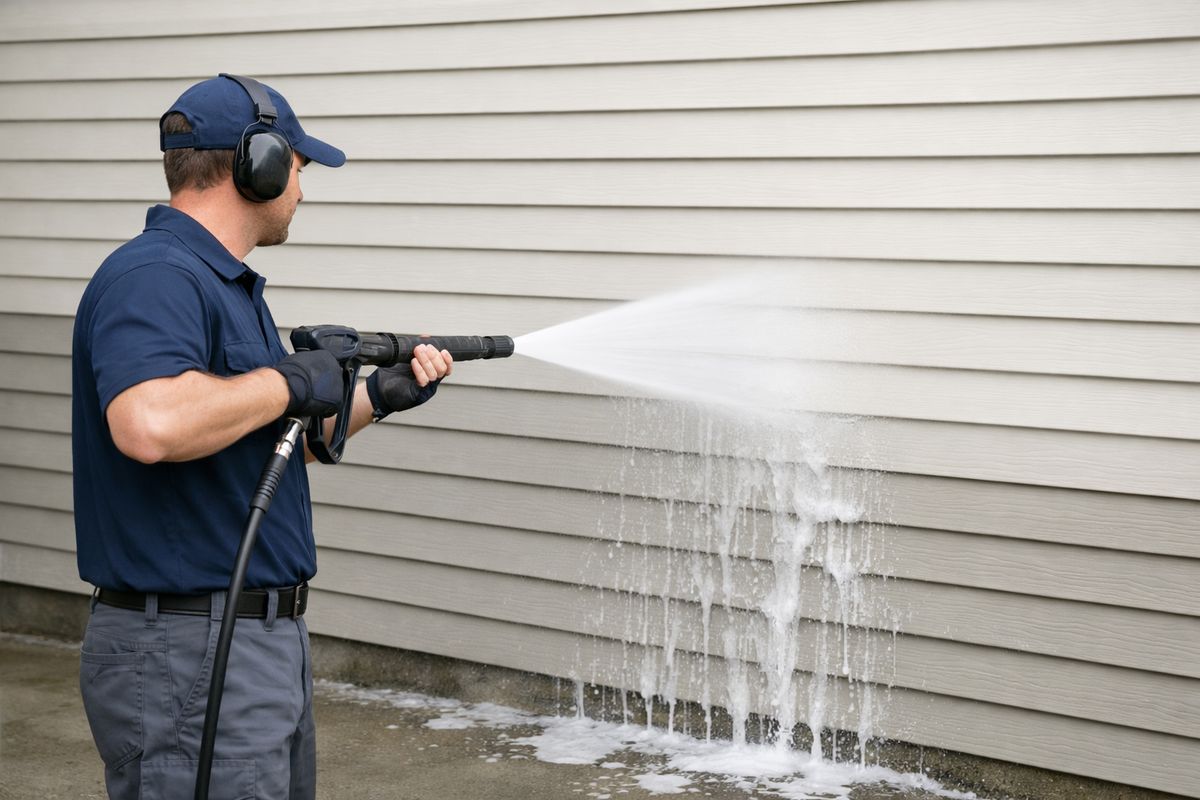
If you need to reach up high, an extension wand is safer than trying to work from a ladder with a live pressure washer. That said, safer does not always mean easy. Extension tools get heavy and can kick back more than expected.
A basic setup list looks like this:
- Pressure washer with adjustable output
- Garden hose with steady water supply
- 25-degree or 40-degree nozzle
- Vinyl-safe house wash detergent
- Pump sprayer or detergent tank
- Safety glasses and gloves
- Plastic or waterproof outlet covers
- Tarps or plastic for delicate items
- Plant-wetting hose nozzle
- Soft brush for stubborn spots
- Extension wand, if needed
Recommended pressure washer settings for vinyl siding
PSI means pounds per square inch, which is just a way of measuring how hard the water hits the surface. For vinyl siding, lower is better. A common safe working range is around 1,200 to 1,500 PSI, and starting lower than that is smart if your machine allows it. Consumer guidance for siding often lands in that same 1,200 to 1,500 psi range.
But here’s the thing: the machine setting alone does not tell the whole story. Nozzle choice, spray angle, and how far you stand from the wall can make a moderate machine act harsh or gentle.
For older siding, painted vinyl, or panels that already seem chalky or brittle, soft washing is usually the better move. That generally means under 500 PSI, plus a cleaner that does most of the work. If you want a clearer breakdown of when the gentler method wins, this guide on when a lower-pressure approach makes more sense is worth reading before you start.
The best nozzle tips and attachments to use
Use a wide spray pattern. A 40-degree nozzle is the safest place to begin, and a 25-degree tip can work if you need a little more rinsing power and you keep your distance.
Skip anything that concentrates the stream too tightly. Red 0-degree tips are out. Turbo nozzles are out. Pinpoint tips are out. Those are great on hard concrete grime and awful on vinyl siding because they turn the water into a cutting tool instead of a rinse.
If your pressure washer came with a rotary or turbo tip, leave it in the case. It can etch, dent, or force water where it does not belong. Vinyl rewards patience, not aggression.
Cleaning solutions that are safe for vinyl
Use a detergent labeled for vinyl siding or house washing. The right cleaner helps with pollen, road film, mildew, and algae better than pressure alone ever will. On shady walls with green or black growth, a mildew-focused cleaner usually works better than a plain soap.
Avoid harsh solvents, undiluted bleach mixes that are stronger than the label calls for, and anything not meant for exterior siding. Also avoid guessing. If the label gives dilution instructions, follow them exactly. Stronger is not cleaner here, it is just riskier for plants, trim, and the siding finish.
Most exterior washing happens with cold water, surfactant, and moderate pressure for a reason. In fact, most soils surrender under 2,000 PSI when detergent is doing its job, which is another way of saying you do not need brute force to clean a house.
Check your siding first: make sure pressure washing is a good idea
Before any washing starts, walk the house slowly. Look at the siding the way you would look at a windshield before a road trip. Tiny problems matter.
Check for cracked panels, loose sections, open seams, missing pieces, failing caulk, damaged trim, and spots where utility lines or vents pass through the wall. Press lightly on suspicious panels. If something shifts, rattles, or feels detached, stop and address that before washing.
Look closely at lower walls, especially on the shady side of the house. That is where splashback, mildew, and previous damage tend to show up first. Also inspect around windows and doors, because those are the easiest places to push water into the wall.
Signs your siding is too fragile for pressure washing
Chalky residue is the big one. If you rub the siding with a dry hand and get a white powdery film, that is oxidation, not ordinary dirt. Pressure washing can make it streak, strip unevenly, and look worse.
Other red flags include warped panels, brittle sections that crack when pressed, obvious hail or impact damage, and repairs that never sat quite flush again. If the siding looks tired in a way that feels structural rather than dirty, switch to hand cleaning or arrange a professional soft wash.
Loose, damaged, or missing siding should be fixed before washing. That is not just good practice, it is a direct way to reduce the risk of water getting behind the cladding and into the wall assembly.
When to read the manufacturer care guidance
If your siding is older, painted, recently repaired, or not clearly identifiable, look up the care instructions before you wash. Some vinyl products handle cleaning differently, especially painted vinyl and specialty finishes.
This matters more than most people expect. A one-size-fits-all method can be fine on newer standard vinyl and absolutely wrong on a faded section that already has finish wear. If you are unsure whether your siding should be washed conventionally or cleaned with a gentler method, it helps to understand the difference between high-pressure rinsing and chemical-based exterior cleaning before you commit.
Step 1: Pick the right day and prep the area
This job gets easier or harder based on weather alone. A calm, mild morning can make the whole thing feel straightforward. Bright afternoon sun in July can turn detergent into streaks before you make it back with the rinse.
- Check the forecast for a dry, mild day with light wind.
- Plan to start in the morning or on the shaded side of the house.
- Make sure you have enough hose length to move freely.
- Clear the work area before mixing detergent.
- Keep kids and pets away until surfaces are dry.
Success here looks simple: nothing fragile nearby, nothing electrical exposed, and no need to rush because the cleaner is drying too fast.
Choose good weather and the right time of day
Aim for mild temperatures and low wind. Spring and fall are usually easiest, and morning is often better than late afternoon. Direct sun heats the siding, which makes detergent dry too fast and raises the odds of streaking.
In Tennessee summer weather, a sticky 2 p.m. setup is asking for trouble. An 8 a.m. start on the shaded side of the house is a lot more forgiving. General guidance also tends to favor spring or fall for siding because conditions are milder and mildew is easier to manage.
Move or cover anything that should stay dry
Move patio furniture, grills, potted plants, welcome signs, hanging decor, and anything fabric-covered. Cover cameras, doorbells, and delicate fixtures if they sit right in your spray path.
Take a minute to look for things that are easy to miss, like extension cords, decorative lights, and package boxes by the front door. A clean work zone saves time because you are not stopping every five minutes to dodge or re-aim around clutter.
Wet down nearby plants and protect outlets
Before applying detergent, soak the surrounding plants with plain water. Pre-wet leaves and soil so they absorb less cleaner if overspray lands on them. It is a quick step, and it works.
Cover exterior outlets, exposed connections, and any electrical fixture that should not get soaked. You do not need to wrap the whole house in plastic, just the obvious vulnerable spots. Keep it practical.
Step 2: Set up the machine for a gentle wash
Do not use the machine exactly the way it came out of the box. Factory setup is often aimed at general cleaning, not siding safety.
- Connect the garden hose and make sure water is flowing fully before starting the machine.
- Install your widest safe fan-tip nozzle.
- Set the pressure to the lowest useful level.
- Attach the detergent pickup or fill your pump sprayer.
- Test the spray pattern on pavement first, not the siding.
Your checkpoint is easy: the spray should look broad and even, not sharp or violent.
Start with the lowest effective pressure
Begin low and creep up only if needed. Vinyl siding rarely needs much force, especially if the detergent is doing its job. More pressure does not mean a better result, it usually just means a higher chance of damage.
If your washer does not let you dial down PSI precisely, you can still soften the effect by using a wider tip and standing farther back. In practice, those two adjustments matter a lot.
Attach a wide fan-tip nozzle
A wide fan pattern spreads the water out so it rinses instead of cuts. Start with a 40-degree tip, then switch to a 25-degree only if the rinse feels too weak and the siding is in good condition.
Keep the nozzle several feet from the wall at first. You can move slightly closer if needed, but there should always be space between the wand and the siding. If the spray feels like it is slapping the wall, you are too close.
Use detergent injection the right way
If your washer has a detergent tank or siphon tube, use the soap setting exactly as directed. If that setup feels unreliable, a pump sprayer is often simpler. Spray the cleaner on separately, then rinse with the pressure washer.
Measure dilution carefully. Too much cleaner can leave residue, stress nearby plants, and create more rinsing work than necessary. Too little cleaner means you will be tempted to compensate with pressure, which is the wrong trade.
Step 3: Test a small hidden section first
This is the five-minute step that saves hours of regret. Test first, always.
- Pick a low-visibility patch.
- Apply detergent the way you plan to do the rest of the house.
- Let it dwell for a few minutes without drying.
- Rinse using the same angle and distance you plan to use everywhere else.
- Wait a moment and inspect the surface closely.
If the siding looks clean and stable, keep going. If not, adjust now.
Pick a low-visibility area
Choose a section behind shrubs, along a side wall, or anywhere a small mistake will not stare at you every time you pull into the driveway. Lower wall sections are easiest because you can inspect them up close.
The point is not just to see whether dirt comes off. It is to make sure the siding behaves well under your exact setup.
Check for chalking, streaks, or loosened panels
After rinsing, look for white chalk in the runoff, streaks that were not there before, or panels that fluttered or shifted during washing. Run a finger across the surface. If it comes away dusty white, you are dealing with oxidation.
That is your cue to stop pressure washing that section. A gentler restoration method is a better call than pushing forward and making the whole wall uneven.
Step 4: Apply cleaner from the bottom up
This is one of those details that sounds backward until you see why it works. Applying cleaner from the bottom up helps prevent dirty runoff from streaking down over dry siding and leaving lines behind.
- Start at the bottom of one section.
- Work upward in horizontal passes.
- Coat the siding evenly, but do not drench it.
- Finish one manageable zone before moving to the next.
- Watch the surface so the cleaner never dries.
Work in manageable sections
Divide each wall into sections small enough to rinse before the detergent dries. On a mild day, that might be a few panels wide. On a hot bright day, it might be even smaller.
Think repeatable, not heroic. A wall cleaned in tidy sections usually looks better than a wall attacked all at once. This is also where the job starts feeling less chaotic and more like a routine.
Let the cleaner dwell without drying
Most siding detergents need a few minutes to loosen grime, algae, and mildew. Follow the label, but in general, let it sit briefly and keep an eye on it. If it starts drying, rinse immediately.
Dwell time matters because the cleaner is softening what you want to remove. Extra pressure is not the substitute for patience. On organic buildup, more dwell time with the right chemistry beats more PSI almost every time.
Step 5: Rinse with the right angle and distance
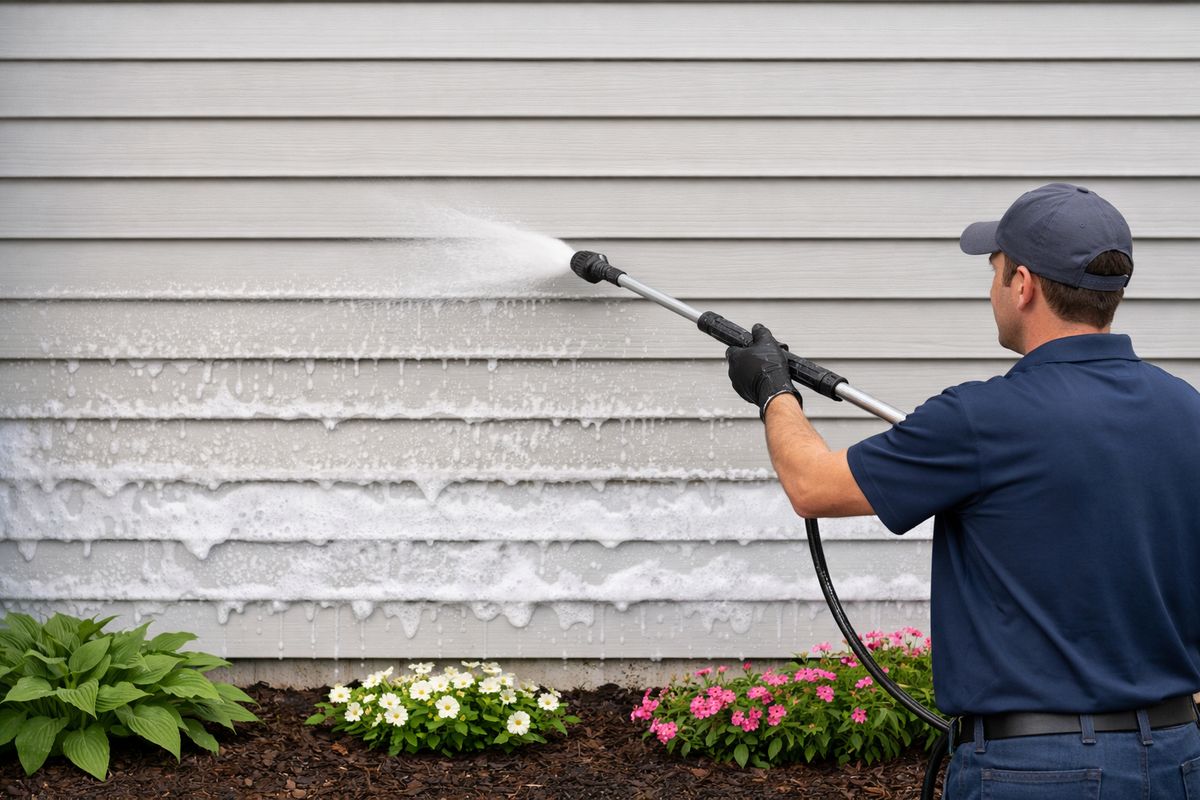
This is the part that makes or breaks the whole project. Rinsing is not just spraying water until the soap is gone. It is controlled water placement.
- Stand so you can spray straight at the wall or slightly downward.
- Keep the wand moving in smooth passes.
- Stay far enough back that the water rinses rather than hammers.
- Start at the top of the cleaned section.
- Work downward until all soap residue is gone.
Your checkpoint is a clean, even surface with no soap trails and no water being driven under the siding laps.
Spray straight on or slightly downward
Never aim upward into the lap joints. That is the classic mistake, and it is how water ends up behind the siding. Keep the spray perpendicular to the wall or slightly downward so water runs off the way rain naturally does.
Pay extra attention around seams, vents, trim, and the bottoms of window frames. Even if the siding itself handles the wash fine, those openings are where trouble starts.
Keep a safe distance from the wall
Start farther back than you think you need, then inch closer only if the rinse is not effective. Often that means several feet from the wall, depending on the machine, nozzle, and pressure setting.
Older siding should be treated even more gently. If the wall is soft, chalky, or sun-faded, give it more distance and more time instead of more force. A clean rinse should feel controlled, never aggressive.
Rinse top to bottom in smooth passes
After the detergent has done its work, rinse from top to bottom so soap and loosened grime flow off cleanly. Overlap your passes slightly to avoid striping.
Slow, even passes beat quick random sweeps. If you move too fast, you will miss soap. If you zigzag around, you will leave uneven lines that only show up after the wall dries, which is annoying because then you get to do that section twice.
Step 6: Handle mildew, algae, and heavy stains without getting aggressive
Some stains need a second round, and that is normal. The mistake is assuming stubborn marks require more pressure.
- Identify whether the stain is organic growth, dirt, or oxidation.
- Reapply the right cleaner to the problem area.
- Let it dwell a little longer, within label limits.
- Agitate gently with a soft brush if needed.
- Rinse again with the same safe angle and distance.
That approach is slower, but it protects the siding. There is a reason soft wash systems use far less pressure for exterior cleaning while aiming to preserve surfaces.
Treat green or black growth separately
Green film, dark spotting, and shady-side streaks are usually organic growth, not plain dust. Those areas respond better to a cleaner made for mildew or algae than to more water force.
This comes up a lot on north-facing walls, under eaves, and behind shrubs where moisture hangs around. If one side of the house keeps looking dirty faster than the others, it is often because the environment there stays damp longer, not because you cleaned it wrong.
Spot-clean problem areas gently
Reapply cleaner to the stubborn section and use a soft brush only if needed. Brush lightly, especially around corners, trim edges, and lower splashback zones where grime can cake on.
Then rinse again with the same safe method. No closer, no sharper angle, no turbo tip. The trick is repeating the right process, not escalating to the wrong one.
Know when stains are oxidation, not dirt
Oxidation looks chalky, faded, and sometimes unevenly dull. When you wipe it, white powder transfers to your hand or cloth. That is not dirt sitting on the surface. It is surface wear from the vinyl itself.
Pressure washing oxidation usually makes the appearance more blotchy. If you see this, stop trying to wash it away. At that point, cleaning has reached its limit and restoration or replacement becomes a separate decision.
Step 7: Clean around trim, windows, doors, and vents carefully
Open wall sections are the easy part. Detail areas need patience.
- Reduce pressure or step back before reaching openings.
- Change your angle so you are rinsing across the area, not into it.
- Slow down around trim joints and caulk lines.
- Avoid direct spray into vents and penetrations.
- Inspect these spots again after rinsing.
Reduce pressure near openings and edges
Around windows, doors, dryer vents, utility penetrations, and light fixtures, use less force and more control. These are the areas where leaks happen fastest because seals, gaps, and trim joints are already doing a lot of work.
Even if the wall can handle more, the opening may not. A cautious rinse here saves you from problems you cannot see right away.
Skip direct blasting at gaps and seams
Do not aim into cracks, panel ends, trim gaps, or the edges where different materials meet. Wash around those areas. Let the runoff carry dirt away instead of trying to inject water into every seam.
Consumer guidance on siding makes the same point: avoid trapping water behind siding and avoid spraying directly into gaps around doors, windows, or lap joints. That is the whole game.
Step 8: Tackle second-story siding safely
Height changes everything. A simple rinse on the first floor can turn awkward fast when you are trying to reach a dormer above a sloped driveway.
- Stay on the ground whenever possible.
- Use an extension wand only if you can control it comfortably.
- Work slowly and keep both feet planted.
- Skip any area that forces you to lean, twist, or overreach.
- Call a professional for sections that feel unsafe.
Use extension wands with care
Extension wands help you reach higher without climbing, but the extra length increases kickback and reduces control. That matters because control is the whole point of washing vinyl safely.
Practice on a lower area first. If the wand feels unwieldy, stop there. It is better to leave an upper gable for later than to lose control and rake a concentrated stream across the siding.
Know when height changes the risk
A second story over flat ground is one thing. A second story above a steep grade, landscaping bed, or sloped concrete drive is another. Those setups turn a weekend project into a risk calculation.
If access is awkward, the siding is fragile, or the staining is heavy enough to need more than a basic rinse, hiring a pro usually costs less than fixing a mistake. If you start shopping around, this article on what to look for in a local exterior cleaning company helps sort the careful crews from the reckless ones.
Step 9: Do a final rinse and post-wash check
Do not pack up the second the wall looks clean. The final inspection is what catches soap film, missed streaks, and little issues that only show after water starts drying.
- Rinse the surrounding area one last time.
- Walk the house from different angles.
- Look closely around seams, lower courses, and trim.
- Check for panel movement or trapped debris.
- Let the siding dry, then inspect again if needed.
Inspect for missed spots and soap film
Step back 15 or 20 feet and look at the siding in angled light. Then walk up close. Some residue only shows from a distance, and some only shows from inches away.
If you find a soapy patch, rinse it now. Dried detergent can leave visible film, especially on darker siding. A slow walk-around at this stage is easier than dragging the hoses back out tomorrow.
Check for water intrusion or loosened panels
Look around windows, door trim, vents, and lower panel courses. Make sure nothing rattled loose and no obvious water entry points were hit.
If a panel edge looks popped out, stop messing with it using the washer. That is now a small siding repair, not a cleaning issue. Also check inside near the washed area if you are worried you sprayed into a vulnerable opening.
Step 10: Clean up and help the siding stay clean longer
A few extra minutes now will make the next wash easier and help the current result last longer.
- Flush detergent from the machine.
- Disconnect and drain hoses.
- Rinse nearby plants and hardscapes.
- Store nozzles and gear where you can find them next time.
- Reduce the conditions that made the siding dirty in the first place.
Rinse equipment and store it properly
Run clean water through the detergent system so soap does not dry inside the lines. Drain the hoses, remove the nozzle, and store the tips in a container instead of tossing them in a drawer.
This sounds boring because it is boring. But a clogged detergent line or missing nozzle six months from now is even more annoying.
Trim back landscaping and reduce future buildup
If shrubs touch the siding, trim them back. If sprinklers hit the wall, adjust them. If one corner stays green all year, look for shade and moisture sources nearby.
Routine maintenance works better than waiting for thick buildup. In a humid area, regular cleaning with restraint is easier on the siding than infrequent cleaning with force. For a broader schedule, this guide on how often a Tennessee home really needs washing gives a useful benchmark.
Common mistakes that damage vinyl siding
Most vinyl siding damage from washing comes from a handful of preventable mistakes. Using too much PSI is the obvious one, but not the only one.
The wrong nozzle causes plenty of problems too. Narrow tips and turbo nozzles turn a safe rinse into a focused blast. Spraying upward is another classic error, especially under the siding laps and around windows. That is how water gets pushed behind the panels.
Washing damaged siding is also a bad bet. Loose sections, failed caulk, and cracked trim should be fixed first. And letting detergent dry on the surface can leave streaks that make the house look worse even though it is technically cleaner.
One more mistake deserves mention: treating all stains like dirt. Oxidation is not dirt. If chalk keeps coming off, you are not dealing with a normal wash job anymore.
Troubleshooting: if something looks wrong mid-wash
If something feels off, stop. Most siding problems get worse because somebody notices the issue and keeps spraying anyway.
The siding looks streaky after drying
Streaks usually come from uneven rinsing, detergent drying too fast, or working in direct sun. Re-wet the section, apply a light amount of cleaner if needed, and rinse again in smooth overlapping passes from top to bottom.
Make the next section smaller. Also switch to shade if possible. Streaking is annoying, but it is usually fixable.
White chalk keeps coming off on the surface
That is oxidation. Stop pressure washing that area because you are no longer removing grime, you are disturbing the surface.
A gentler restoration method is the better choice. If the oxidation is widespread, professional help makes sense because the fix is no longer a basic wash.
A panel rattles, shifts, or looks loose
Stop spraying that area immediately. Do not try to blast it clean from another angle. Loose siding is an installation or repair issue now.
Let the area dry, then inspect the panel edge and fastening points. If it is minor, it may just need to be resecured. If it is cracked or badly detached, repair it before any more washing happens nearby.
Water may have gotten behind the siding
If you accidentally sprayed upward into a seam or opening, stop and give the area time to drain and dry. Check nearby trim, window edges, and if needed, interior walls for any signs of moisture.
Do not keep washing that section to “flush it out.” More water is not the fix. If you suspect real intrusion, let the area dry fully and inspect before continuing.
When to skip DIY and call a pro
DIY makes sense when the siding is in good condition, the house is accessible, and the staining is ordinary dirt, pollen, or light mildew. It stops making sense when the house is tall, the siding is oxidized, or the condition of the wall is questionable.
If you see chalking, brittle panels, high awkward walls, heavy organic growth, or gaps around windows and trim, a professional soft wash is the safer move. In Clarksville, local house washing services often deal with the exact mix of pollen, humidity, and algae that makes siding tricky to clean without overdoing it.
Cost matters, sure, but repair costs matter more. Professional siding cleaning can range widely, and that range often reflects access, condition, and how much detail the job requires. Paying for the right method is usually cheaper than paying for damaged siding and water intrusion later.
What kind of result you should expect
A proper wash should remove surface dirt, pollen film, most mildew staining, algae, cobwebs, and general dinginess. The house should look brighter, cleaner, and more even from the curb.
What it will not do is reverse age. Fading from years of sun exposure stays. Oxidation stays unless it is handled as a restoration project. Deep discoloration from permanent staining may lighten, but not disappear.
That is normal. Clean siding should look clean, not brand new. If you are getting the property ready for photos, guests, or sale, that change alone can go a long way. Exterior cleaning is often one of the fastest first boosts for curb appeal because it removes the grime that makes everything else look neglected.
What to do next after the siding is clean
Once the siding is dry, small flaws become easier to spot. Touch up trim if needed, clean the gutters if they left tiger stripes, and inspect caulk around windows and doors. If painting is coming next, this wash gives you a much clearer picture of what prep the surface actually needs.
The main thing is not to rush from a successful test patch straight into full-speed house washing. Try one small section first, confirm your setup is gentle and effective, and then repeat that same method around the rest of the house. That one small test is the difference between a satisfying cleanup and a weekend repair project.
Frequently Asked Questions
Can you pressure wash vinyl siding without damaging it?
Yes, if you use low pressure, a wide fan-tip nozzle, safe detergent, and the right angle. The biggest risks come from spraying upward, standing too close, or using more pressure than the siding needs.
What PSI is safe for vinyl siding?
A common working range is about 1,200 to 1,500 PSI, but starting lower is smarter. Older, painted, oxidized, or delicate siding often does better with soft washing, which uses much lower pressure and relies more on cleaner than force.
Should you use bleach on vinyl siding?
Use only cleaners labeled for exterior siding and follow the dilution instructions exactly. Some mildew cleaners contain bleach-based ingredients, but stronger homemade mixes are not automatically better and can harm plants, trim, or finishes if used carelessly.
Why does white chalk come off when you wash vinyl siding?
That is usually oxidation, not dirt. It means the surface is breaking down from age and weather. Pressure washing can make oxidation look streaky, so it is better to stop and switch to a gentler restoration method.
Is it better to spray siding from the bottom up or top down?
Apply cleaner from the bottom up to reduce streaking. Rinse from the top down so soap and loosened grime flow off evenly. Those two directions work together.
How often should vinyl siding be washed?
Most homes do well with washing every 12 to 18 months, though shaded, humid, or high-pollen areas may need it sooner. If one side of the house stays damp or green, that section may need more frequent attention than the rest.